First PC Build
as a software person intimidated by hardware
One of the things I thought I would never cross from my bucket list is building a PC. But here I am facing my fear… Consider this post a light documentation for my future self who might want to build another computer.
Using PC Part Pickers
Before starting my build, I used PC Part Picker to research and select compatible components. The last thing I would want is to realize I bought a case too small for my motherboard or other shenanigan. The tool really helped me avoid compatibility issues and compare prices across different retailers. It was especially useful for checking people’s reviews on their experience with a particular motherboard, CPU, RAM, or case. I settled for a small but mighty build that will provide ample computing power to handle game dev and graphics rendering but still allow me to transport it more easily during my upcoming move-out - and it’s more aesthetics according to my computer engineer brother. My part list can be found here
Steps I Went Through to Assemble the Computer
As a total newbie, I followed Linus Tech Tips PC Build Guide (2024). The order is as follows:
1. Install the CPU on the motherboard: First, I opened the socket in the middle of the motherboard by undoing the latch, inspect the grid of golden pins - where the CPU will sit - to ensure no pin is deformed.
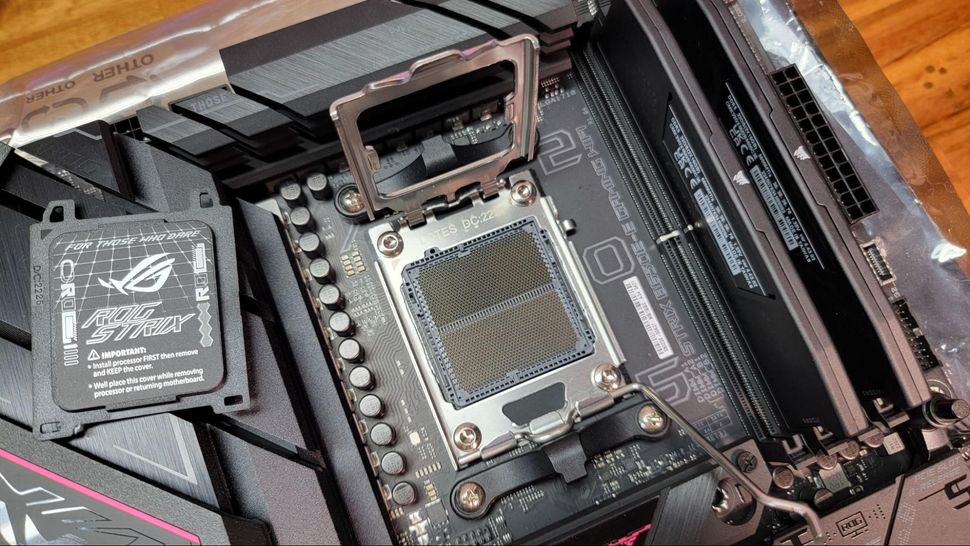
When all was well, I placed the CPU (no touching the gold plates at the bottom) in the orientation indicated by a small triangle and closed the lid with all my courage because I was constantly fearing I might break something.
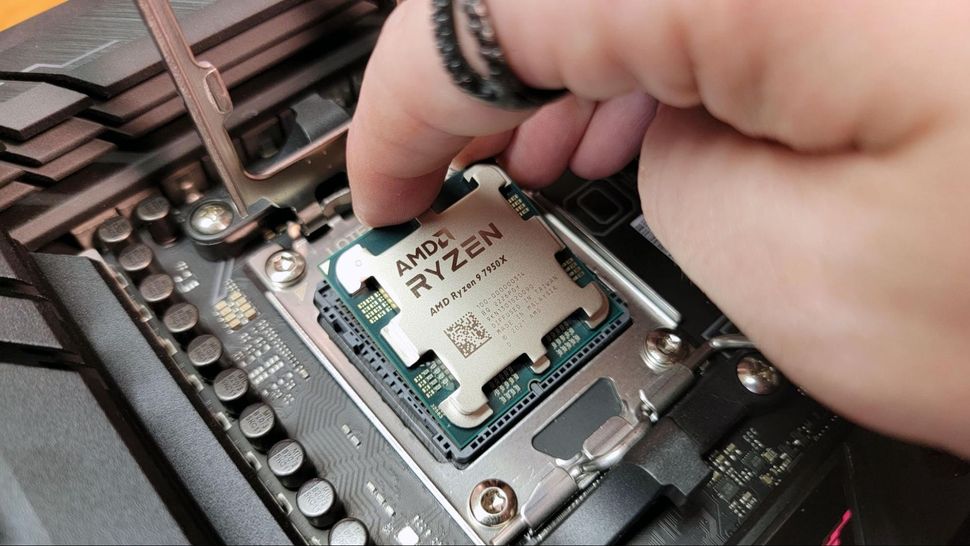
I recommend looking at this detailed visual guide. The article described exactly the steps I took.
2. Insert the RAM on the motherboard: This part was no brainer for my build. There were two RAM sticks, and there were two slots. Easy, right? But then which way do I stick it in? Wait, there’s a latch I have to unlock too? Yes, I had to push down on the latches to ensure they’re in the open position. To determine which side faces the latch, I made sure to estimate with the notch in the middle of the slot and pressed the RAM stick down until there was a click sound.
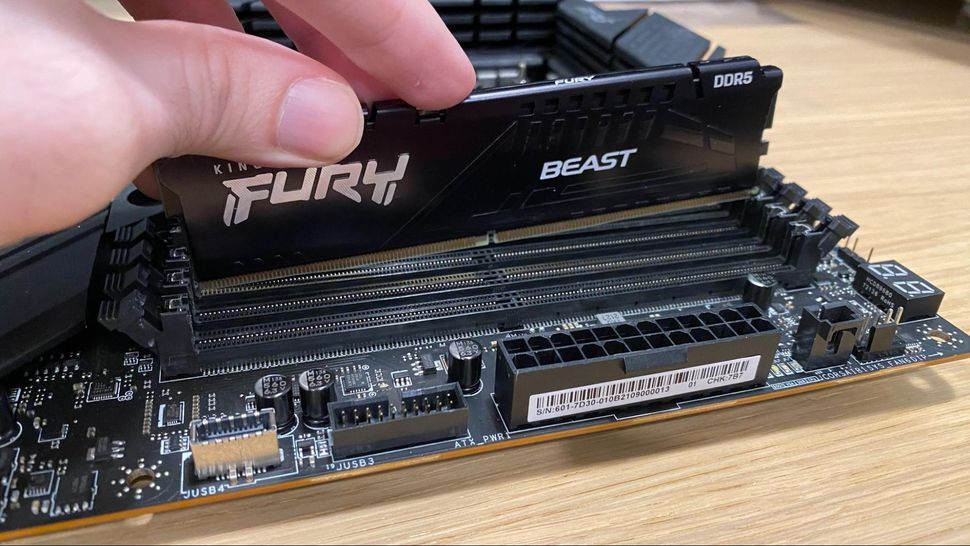
The final result should look like this.
3. Add M2 SSD to its slot: My SSD is a PCIe / NVME type, so this was a good next step to install it on the motherbooard before things got too clunky. After carefully unscrewing and removing the heatsink, I placed the SSD in the slot closest to the CPU - for the faster access speed. The SSD card should be tilted around 20 - 30 degree, with all the gold plates fully inserted. Once I saw that the card should be able to stand on its own, I gently pressed it down and aligned it with the standoff, finishing up by putting the peeled heatsink back on and securing the heatsink with a screw.

The result should look like this.
4. Mount the cooler on top of the CPU: I would not recommend doing this step the way I did lol. My cooler fan was gigantic and not flat down at all. The fan setup was a mini skyscraper! I should have done this after fixing the motherboard inside the case and connect all the front panel wires. I first applied a pea-sized blob of thermal paste on the CPU (very questionable to me at first), then installed the cooling tower on top of the CPU which would helped press the paste evenly on the CPU. Hooked the fans up using the thin strips, plugged in the fan to the motherboard through appropriate pins, and voila.

5. Slot in the GPU: I had a 4060 card, which was way heavier than I expected, so leaving this step later would have been a better idea, since a bulky card would block easy access to headers and connectors on the motherboard. I unlatched the PCIe X16 slot and connected the GPU into the motherboard - the holes in the slot should hint which way the card needs to orient.

6. Connected all cables to the PSU: I started by connecting the 24-pin cable from the motherboard to the PSU, making sure both ends were securely attached (I mistakenly left one end hanging at first). Next, I found the 8-pin PCIe cable for the GPU and plugged it into both the graphics card and the PSU—making sure not to confuse it with the CPU cable. Finally, I connected the 8-pin CPU cable to the appropriate slot on the motherboard (the manual was a lifesaver here) and then to the PSU. I ended up using only 4 slots on this PSU:

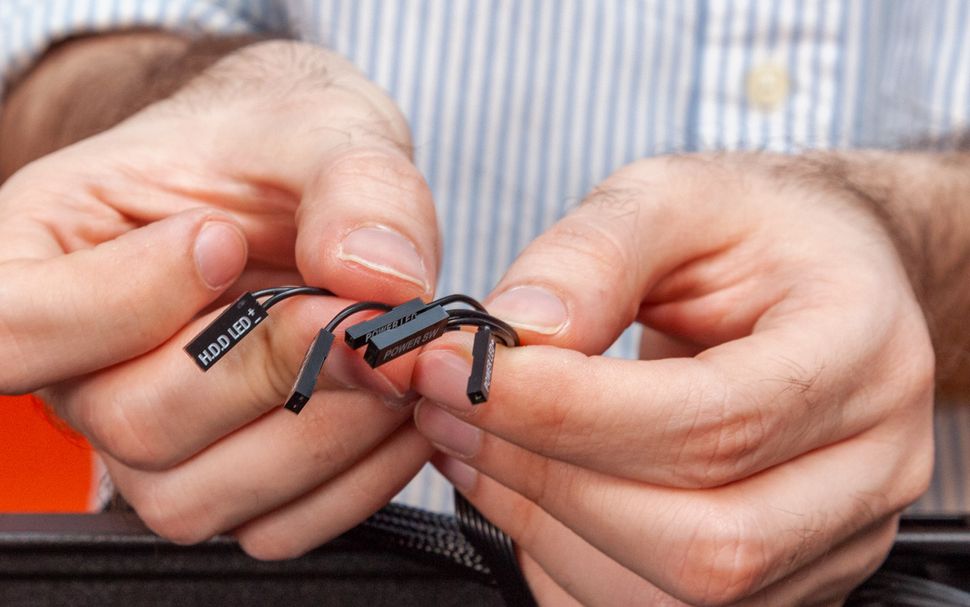
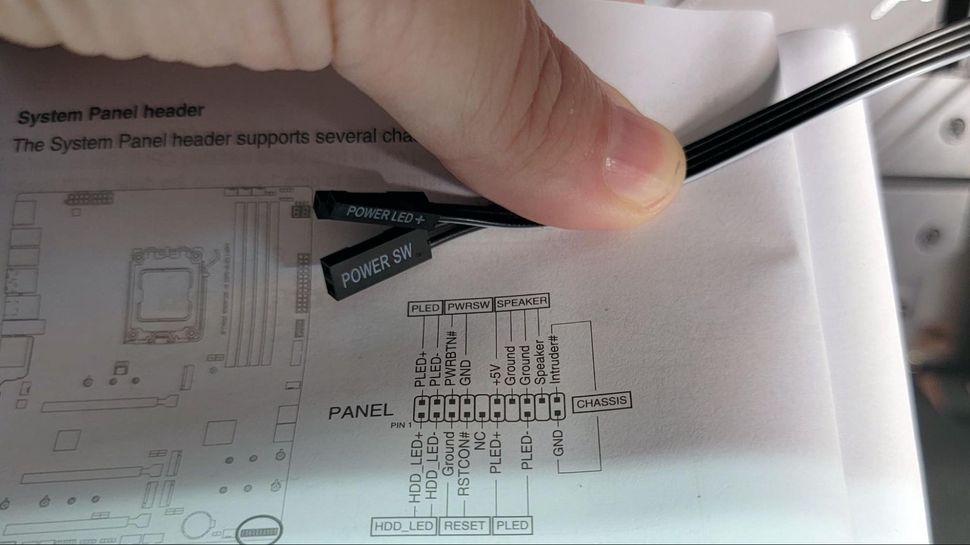
7. Put everything inside the case: This is where I realized the order of assembly really matters. After installing the CPU, I should have mounted the motherboard in the case before adding the gigantic cooler and graphics card, since those made it almost impossible to reach the front panel pins. Thankfully, with some patience, tiny fingers, and a chopstick, I managed to screw in the motherboard and connect all the necessary pins. To prepare the case, I installed four standoffs to match the mounting holes on my motherboard, removed a slot cover at the back for the GPU’s ports, and installed the PSU at the bottom. Then I connected the Power LED, Power Button, Reset Button, and HD Audio wires to the corresponding pins (taking positive and negative charges very seriously here) on the motherboard — reading the tiny labels and double-checking with the manual as needed.
8. Turn on the system: Powered on the system and configured BIOS settings before installing the operating system. I am once again tied to the Window System.
Things I Have Learned
Building a PC is not as scary as it feels to me. Fortunately on my part, nothing too serious went wrong. All parts came exactly as expected, so I did not need to buy extra things to assemble the components. The times I got confused was when trying to boot the system up a.k.a a prebuild test outside the case. I did not connect all the pins to power the motherboard unknowingly, so I was so concerned - man did I get a dead PSU or something??? My take is that I should calm down when facing uncertainty, take a step away from the project once in a while, and read the manual and step more carefully. One thing I would be extra careful about in the future is preventing static, even though I was pretty lax in this first attempt and did not take any precaution at all without any consequences.

Post-Build Experience
I used my build to do personal graphics programming stuff, playing games, and coding projects. Things are going smooth so far, but I will need to do more stress testing. The cable management situation is pretty much neglected, for one I am not too big on the aesthetics (no RGB whatsoever). Nonetheless, it will be the first thing I will do to enable better airflow in case things get heated up.
Tools Used
- Screw driver
- My brother and a lot of guides: Linus Tech Tips PC Build Guide (2024), Wikihow, Tom’s Hardware, Tech Radar
- Blood, sweat, and tears